Device
Jetson Xavier
Flash Jetson with SDKmanager
Download SDKmanager
The most recent version of NVIDIA SDK Manager can be downloaded from https://developer.nvidia.com/drive/sdk-manager
Install the Debian package
sudo apt install ./sdkmanager_[version]-[build]_[arch].deb
Note
where [version], [build] and [arch] represent the current version, the build number and the architecture of SDK Manager. You can see it in the downloaded file. (e.g. sdkmanager_1.1.0-6343_amd64.deb).
Log In and Run SDK Manager follow here: https://docs.nvidia.com/sdk-manager/download-run-sdkm/index.html#download-run
Run NVIDIA SDK Manager
sdkmanager
Select the NVIDIA DEVELOPER tab, enter your developer credentials and click Login

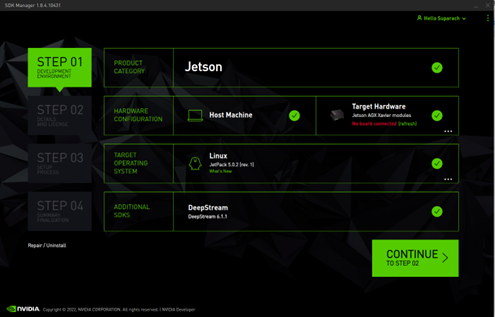
Select your Development Environment
select the board to flash, the version of the operating system and additional SDKs to be installed.
Launch the Jetson OS Install
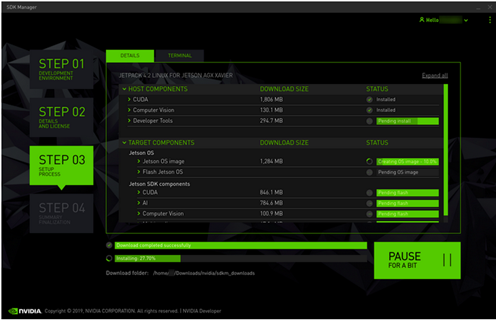
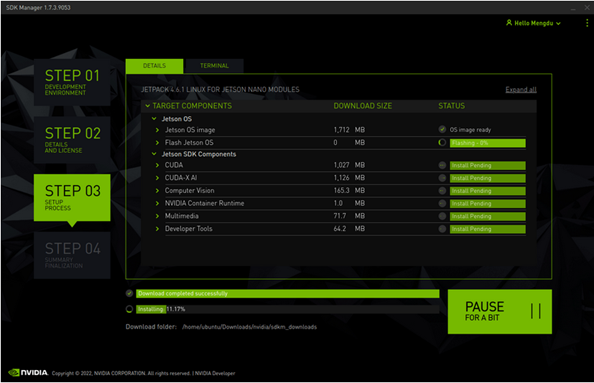
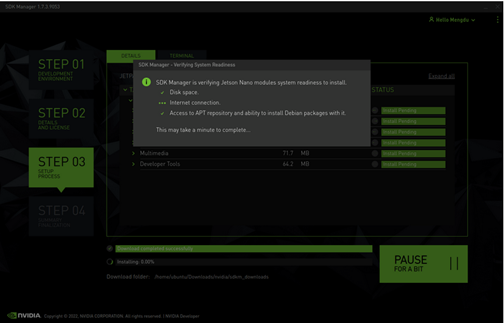
Before the installation can begin, you will need to enter your sudo password. The SDK Manager will then display the progress of the download and software installation.
Installing system & Hardware Setup
SDK Manager supports two options to put your Jetson target into Force Recovery Mode. We understand the operation of Jetson-202 Carrier Board into force recovery mode and have already been in force recovery mode in the previous steps. So we select
Manual setup: set the target to Force Recovery Mode via manual operations.
You can also choose whether to pre-configure the OEM configuration.
Pre-Config: SDK Manager will flash the target with the predefined configuration, and there is no need to complete the System Configuration Wizard after flashing.
Runtime: No default configuration is set on the target, and you will need to manually complete the System Configuration Wizard after flashing.
Note
Here, we select the default Pre-Config.

Following Step in figure above
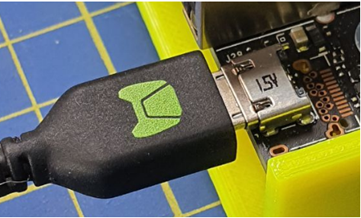
Connect a Micro USB cable to the USB connector.
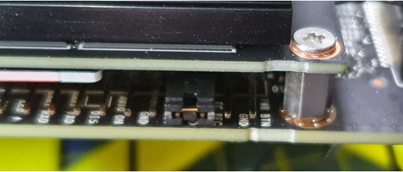
In step 4 you need to Insert a jumper to connect the PINs #9 and #10 of the connector J14 just under the Xavier NX module to Force Recovery on boot.
After that, enter the name and password of the new Jetson system at the bottom, please keep them in mind.
When ready, click Flash to continue.
The display shows the progress of the download and installation of the software. Please wait patiently for the installation to complete.
After a moment, you will be able to see a new window pop up in the NVIDIA SDK Manager, prompting you that you need to connect to your device via IP address. It means the system has been already installed and the components installing will be proceeded

In this case, we can pull out the jumper and restart the board. Then we need to connect the board to a monitor via HDMI, enter the password you entered
At this point you need to connect the board to the same LAN as the Linux host PC and determine the IP address of the Jetson by using the command ifconfig.
Go back to the Linux host PC and enter the IP address you just obtained. NVIDIA SDK Manager will try to connect to the Jetson device and proceed to complete the installation of the next SDK components.
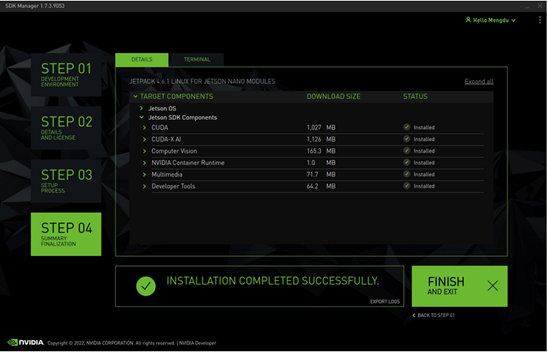
When you see the following window appear, the installation has been done
Install Specific library
TensorFlow
Install system packages required by TensorFlow
sudo apt-get update
sudo apt-get install libhdf5-serial-dev hdf5-tools libhdf5-dev zlib1g-dev zip libjpeg8-dev liblapack-dev libblas-dev gfortran
Install and upgrade pip3
sudo apt-get install python3-pip
sudo pip3 install -U pip testresources setuptools==65.5.0
Install the Python package dependencies
sudo pip3 install -U numpy==1.21.1 future==0.18.2 mock==3.0.5 keras_preprocessing==1.1.2 keras_applications==1.0.8 gast==0.4.0 protobuf pybind11 cython pkgconfig packaging h5py==3.6.0Install TensorFlow 2.9.1 using pip3. This command will install the latest version of TensorFlow compatible with JetPack 5.0.2.
sudo pip3 install --extra-index-url https://developer.download.nvidia.com/compute/redist/jp/v502 tensorflow==2.9.1+nv22.09PyTorch
Install system packages required by TensorFlow
sudo apt-get -y update
sudo apt-get -y install autoconf bc build-essential g++-8 gcc-8 clang-8 lld-8 gettext-base gfortran-8 iputils-ping libbz2-dev libc++-dev libcgal-dev libffi-dev libfreetype6-dev libhdf5-dev libjpeg-dev liblzma-dev libncurses5-dev libncursesw5-dev libpng-dev libreadline-dev libssl-dev libsqlite3-dev libxml2-dev libxslt-dev locales moreutils openssl python-openssl rsync scons python3-pip libopenblas-dev
Download Pytorch version 1.13.0 here https://developer.download.nvidia.com/compute/redist/jp/v502/pytorch/torch-1.13.0a0+936e9305.nv22.11-cp38-cp38-linux_aarch64.whl
Install .whl file package
cd #(where you've downloaded)
pip install torch-1.13.0a0+936e9305.nv22.11-cp38-cp38-linux_aarch64.whl
torch vision
sudo apt-get install libjpeg-dev zlib1g-dev libpython3-dev libavcodec-dev libavformat-dev libswscale-dev
git clone --branch v0.14.0  https://github.com/pytorch/vision
cd torchvision
export BUILD_VERSION=0.14.0
sudo python3 setup.py install
Intel Nuc
Change Karnel of Ubantu
Check current kernel version
uname -r
Installing Ubuntu Mainline Kernel Installer
sudo add-apt-repository ppa:cappelikan/ppa
sudo apt update
sudo apt install mainline
Open Mainline and select version to install
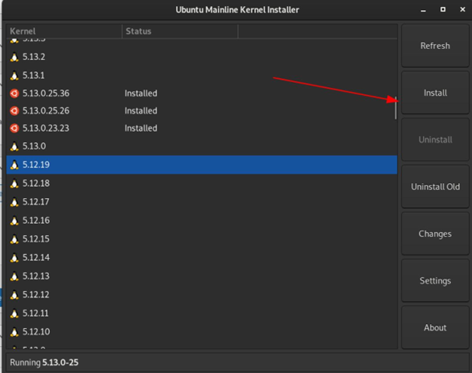
After install complete, reboot Intel NUC
Open Grub menu on boot and select kernel version of ubantu

Install Intel realsense SDK follow this document: some disadvantages:
Remote to device
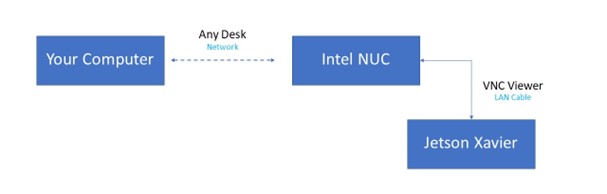
Remote to Intel NUC with AnyDesk
We will use AnyDesk to remote the desktop of Intel NUC from your computer.
Download Anydesk on your computer: https://anydesk.com/en/downloads/windows
Start Intel NUC and open AnkDesk on Intel NUC.
Connect the same network wth Intel NUC.
On your computer connect to the address of Intel NUC.
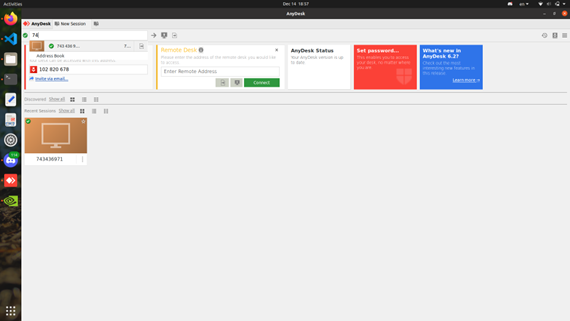
Click accept connect the device on Intel NUC.
Remote Intel NUC with your computer has been done.

Remote to Jetson Xavier
Set up LAN port
Intel NUC
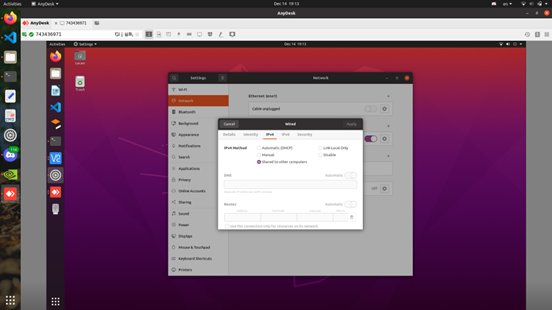
Jetson Xavier
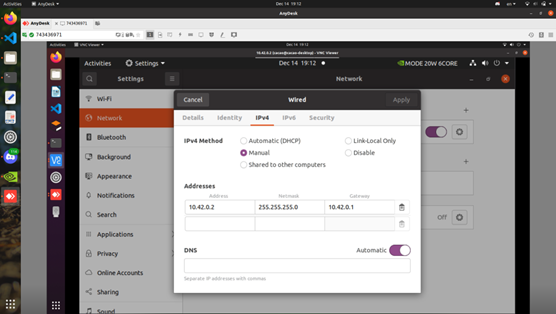
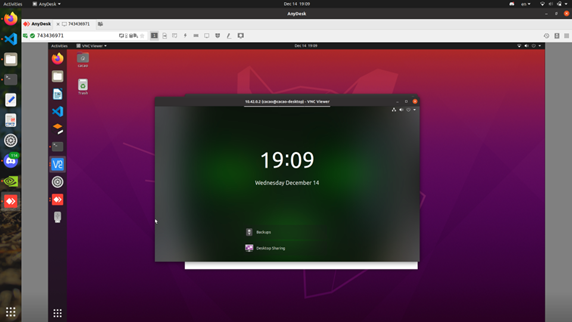
Open VNC Viewer and connect to address 10.42.0.2
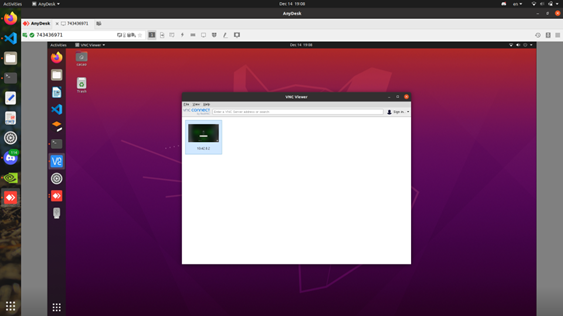
Connect to Jetson Xavier successfully
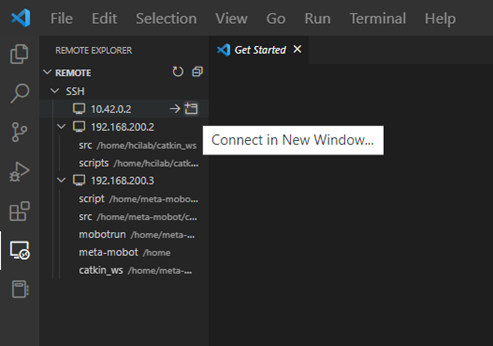
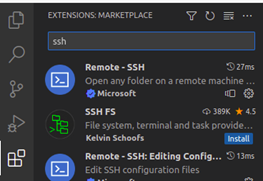
SSH to Jetson Xavier via vs code
For debugging code in Jetson Xavier
Download ssh extension on vscode
Connect ssh to address 10.42.0.2
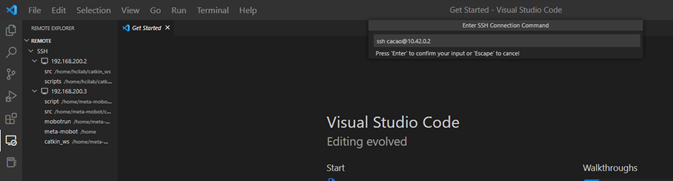
Open a new window of ssh target and connect to Jetson Xavier